Create your very first Snapchat lens in 10 minutes

For your very first lens we'll be making a face stretch lens. It's easy to get started and you can create some really fun effects. You can preview this effect by clicking here or by scanning the snapcode below.
Before you begin
Make sure you've downloaded and installed Lens Studio and that you have a Snapchat account.
Let's go!
When you first open Lens Studio, you'll be greeted by the welcome screen. Feel free to take a look around, but we'll be jumping right into things so click that blue "New Project" button.
Setting up the scene
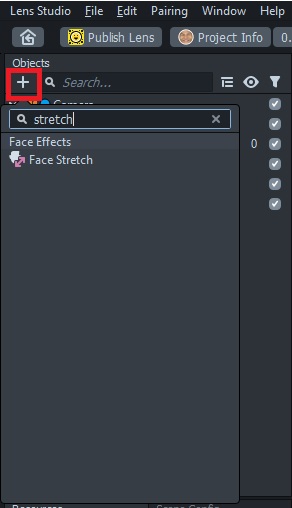
For a basic face stretch lens, the setup is pretty simple. In the Objects panel at the top left, click on the little "+" button and either scroll down or search for "Face Stretch" and then add it.
Stretching the face
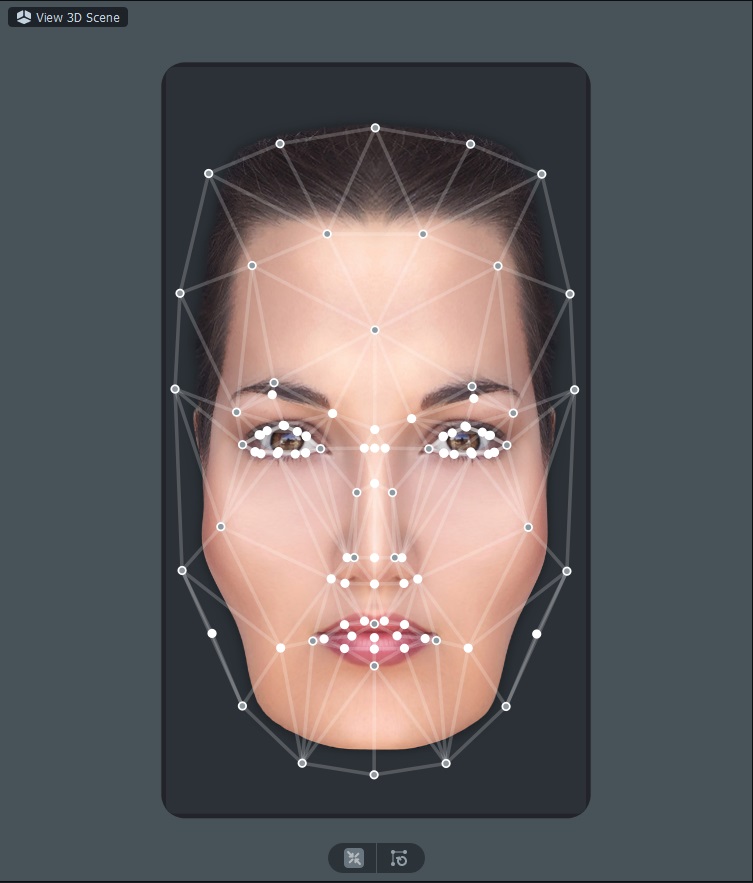
Once you've added the face stretch object, you'll have a new view of the scene in the middle of the window. Instead of a 3D view, you'll now have a 2D view of a face with a bunch of points on it. If you lose this view for whatever reason, you can click on the Face Stretch you added over in the Objects panel.
Each point you see on the face is a control point that you can click and drag. You might notice there are a few grey points and the rest are white. A white point will be influenced by the movement of any nearby points (not movement of the live lens, but movement from you clicking and dragging points). A grey point will stay put, although you can still click and drag those as well. Once you've moved a white point, it will change to grey because Lens Studio assumes that's where you want it to be. You can always click and drag the point, but the movement of nearby points won't affect it.
Down below the face there are two buttons. One button will toggle symmetry on/off (it is on by default) and the other button will reset all of the points. Use the reset button to start over if you aren't happy with how things are turning out.
Now all you have to do is move the points around until you're happy with the result. You can do subtle changes like a slight narrowing of the face for a "beauty" filter, or you can go crazy and create some weird looking faces. Speaking of crazy faces, check out these lenses by Kriptk for some inspiration.
Over on the right in the Preview panel, if you look where it says "Idle Person 1" at the top, you can click that to select different people and facial expressions to make sure everything is looking good.
Submitting your lens
Once you have your effect finished, it is time to submit. If you haven't already, be sure to save your project. I like to create a folder for each lens where I can store additional files such as icons, previews, graphics, etc. You can also preview your lens on your phone before you submit it. In the top right of Lens Studio there will be a button that either says "Send Lens to Device" or a button to pair your device. Follow the guide here if you need help getting that setup.
Before we can submit, there are a few things we need - a lens name, an icon, and a preview. You can get fancy and create an icon in something like Photoshop, but let's keep things simple for our first lens. Over at the very bottom right of the Preview panel, there is a little button that will take a screenshot of whatever is presently visible in the Preview panel. Wait for a shot you like and then click that button and save the image somewhere. We can use this for the icon.
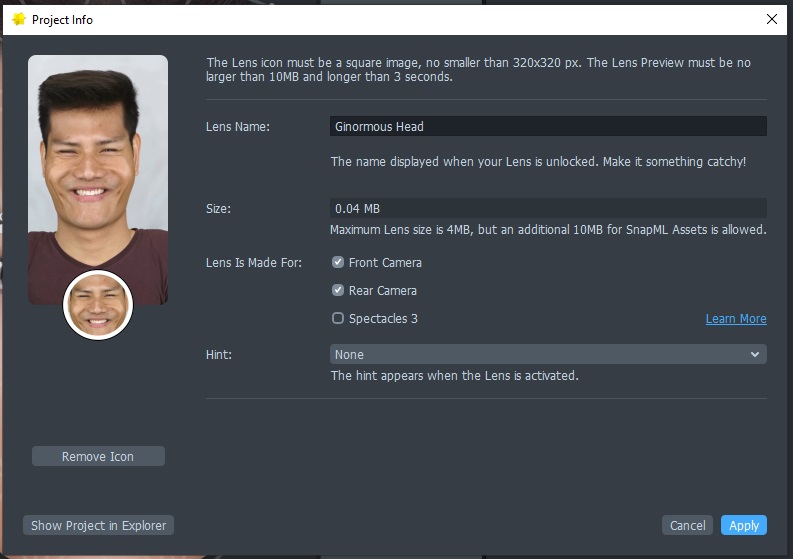
Now click on the "Project Info" button up at the top left of Lens Studio. Give your lens a creative, catchy name. On the left side of the window, there will be a rectangular area and a circular area. Click in the circular area to set the icon. Choose the screenshot we just took and adjust the crop to your liking. Hit apply and then do the same for the preview. Lens Studio will automatically apply your effect to all the preview videos, so you just need to scroll through and choose one that you like.
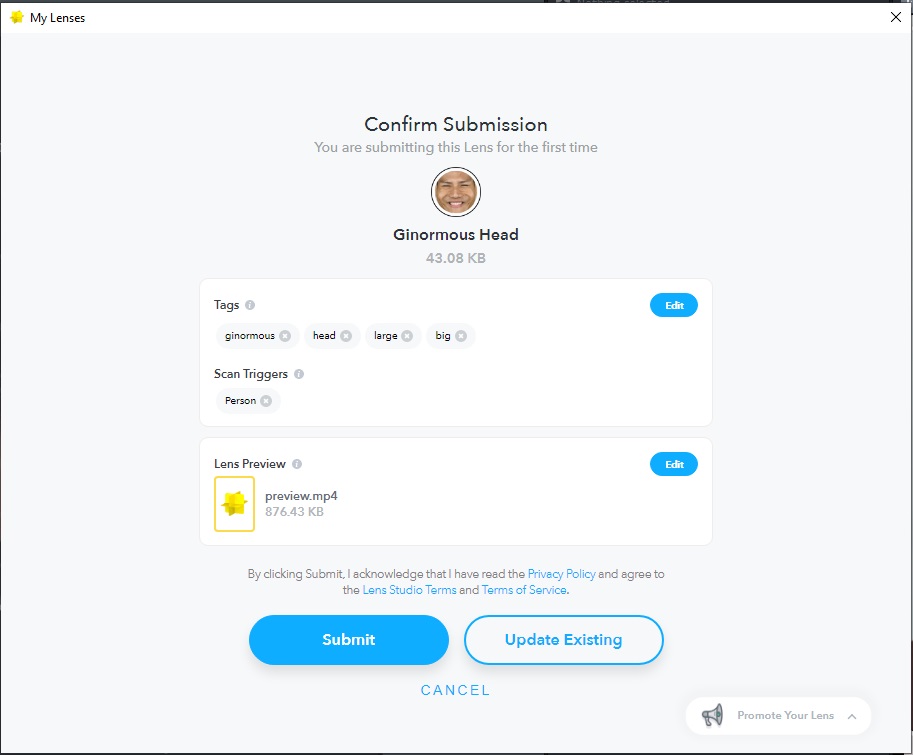
Once all the project info is added, now you are ready to submit your lens. Click on the "Publish Lens" button up at the top left. Add up to eight (8) descriptive tags to help people find your lens, and then for scan triggers go ahead and add "Person" as an option. Your preview will have been automatically added, so now you just need to hit that "Submit" button!
As of Lens Studio 3.3, hitting the "Publish Lens" button will upload your lens and then open up your web browser. The overall process is the same, it just takes place through your browser rather than through Lens Studio.
Sharing your lens
Once you submit your lens, you'll be taken to the "My Lenses" window. Here you'll be able to see a list of all your lenses. Snapchat's review process is usually really quick, so go ahead and hit that refresh looking button next to your profile picture. Your lens should now show as live! You'll get an email with a link to the lens, but you can also hit the arrow to the right of your lens to display the snapcode. Go ahead and share it with your friends!
The stats in My Lenses update only once per day, and there is a minimum of 100 views or something before the stats will show up, so don't worry if you don't see anything there at first.
Congratulations! You just created your first Snapchat lens!